Container Gardening
Sustainable Food Growing In Small Space: 13 Amazing Hacks
Affiliate Disclaimer
This post contains affiliate links. If you purchase through these links, I may earn a small commission at no additional cost to you. This helps support the creation of more helpful content. Thank you for your support!
Discover the Power of Container Gardening
Let’s be honest.
You have a corner of your apartment that gets a sliver of sunlight for approximately 47 minutes a day. You have three dead succulents on your windowsill that you’ve named “Hope,” “Nope,” and “Nope II.” Yet, you scroll through Instagram and see people harvesting lush, organic tomatoes from balconies the size of a yoga mat, and a little green monster—not the eco-friendly kind—stirs within you.
You want that. You want to casually tell your friends, “Oh, this salad? I grew it myself,” while striking a heroic pose. But you also care about the planet. You’re not about to start a farming operation that uses more plastic than a 90s boy band’s merchandise table.
In This Article
- What you want is sustainable food growing in small space.
- The Regrow-Your-Scraps Kitchen Lab
- Microgreens: For Gardeners with No Patience
- DIY Mason Jar Herb Garden
- Fabric Grow Bags: Let Your Roots Breathe
- The Upside-Down Tomato Planter
- The Self-Watering Wine Bottle
- The One-Stop Ecosystem That Feeds You (And Itself)
- Gutter Gardens for Wallflowers
- The Balcony Bean Trellis
- Choose Plants That Don’t Have a Death Wish
- Compost “Lasagna” in a Bucket
- Speak Fluent “Sunlight”
- Group Your Plants by Thirst
What you want is sustainable food growing in small space.
You want to reduce waste, maybe even use organic methods, and do it all without getting evicted for turning your fire escape into a rogue potato farm. Good news, my eco-conscious, spatially-challenged friend. It’s not only possible; it’s easier than you think. Forget everything you think you know about needing a sprawling backyard. Here are 13 amazing hacks to turn your tiny home into a verdant, food-producing paradise.

1. The Regrow-Your-Scraps Kitchen Lab
Before you toss those kitchen scraps, stop. You’re holding future food. Take the white root ends of your green onions, the base of a celery stalk, or the bottom of a head of romaine lettuce. Place them in a shallow dish of water on your sunniest windowsill. Within a week, you’ll witness a small miracle as new green shoots emerge. It’s a powerful first step in reducing food waste and starting your indoor gardening journey.

3. DIY Mason Jar Herb Garden & 4. Fabric Grow Bags
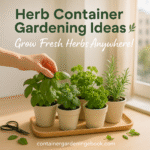
Turn that collection of mason jars into a chic herb garden. Add a layer of pebbles for drainage, fill with potting mix, and plant herbs like basil, mint, or parsley. It’s a direct blow against single-use plastics. For larger plants, consider fabric grow bags. They are lightweight, reusable, and prevent plants from becoming root-bound through “air-pruning,” leading to a much healthier root system.

7. The One-Stop Ecosystem & 8. Gutter Gardens
For those who are serious, the Garden Tower 2 is a revolutionary secret. It grows 50 plants in four square feet and turns kitchen scraps into organic fertilizer via a built-in worm composting tube. For another vertical hack, mount a section of rain gutter on a bare wall. It creates a slim, stylish, and surprisingly productive planter bed for shallow-rooted crops like lettuce, spinach, and strawberries.

11. Compost “Lasagna” & 12. Speak Fluent “Sunlight”
Start composting with a simple bucket. Drill holes for aeration and layer “green” materials (veggie peels, coffee grounds) with “brown” materials (shredded cardboard, dry leaves). This turns your garbage into “black gold” for your plants. Before you do anything, however, you must understand your home’s sunlight. Map where the sun hits and for how long. This is the most critical step to prevent waste and ensure you match the right plant to the right place.

13. Group Your Plants by Thirst
Don’t put a drought-tolerant rosemary in the same pot as a thirsty basil. Grouping plants by their water needs is a crucial strategy for success. Create a “Mediterranean pot” with rosemary, thyme, and oregano, and a separate “moisture-lovers” pot for basil and parsley. This conserves water and prevents you from accidentally drowning or dehydrating your plants.
Grow Vegetables Small Space: 13 Amazing Tips!
Affiliate Disclaimer
This post contains affiliate links. If you purchase through these links, I may earn a small commission at no additional cost to you. This helps support the creation of more helpful content. Thank you for your support!
Discover the Power of Container Gardening
Yes, Even if Your “Garden” is a Shoebox
So, you’re dreaming of crisp, homegrown lettuce, juicy tomatoes, and the smug satisfaction of telling dinner guests, “Oh, this? I grew it myself.” But there’s a tiny, shoebox-sized problem: your “outdoor space” is less sprawling estate and more… well, a suggestion of a balcony. Fear not, intrepid urban farmer! Learning how to grow vegetables in very small space isn’t just possible; it’s an adventure in edible engineering.
In This Article
- Go Vertical, Young Padawan
- Container Crazy is Good Crazy
- Choose Your Champions Wisely
- Sunlight, The Not-So-Secret Ingredient
- Soil Matters (A Lot)
- Water Wisely, Not Wildly
- Feed Your Friends
- Companion Planting: The Buddy System
- Succession Planting for a Continuous Harvest
- Embrace the Window Box
- DIY Self-Watering Containers
- Don’t Be Afraid to Prune
- The Astonishing Garden Tower 2
Forget the back-breaking tilling of yore.
We’re entering an era where knowing how to grow vegetables in very small space is a badge of honor, a testament to your green-thumbed ingenuity. You don’t need acres; you need savvy. And perhaps a willingness to occasionally apologize to your downstairs neighbor for rogue water drainage (we’ll get to that).
Let’s be honest, the desire to learn how to grow vegetables in very small space often stems from a deep-seated need to conquer limitations. Your windowsill is whispering, “I could be more than a dusty ornament graveyard.” Your doorstep is screaming, “Tomatoes, please!” It’s time to listen.
Here Are 13 Amazing Tips To Turn Your Postage-Stamp Plot Into a Veritable Veggie Victory Garden

1. Go Vertical, Young Padawan
When ground space is a myth, look up! Walls, railings, and even sturdy drainpipes are prime real estate. Think hanging baskets, tiered planters, and wall-mounted pockets. Mastering how to grow vegetables in very small space often means thinking in 3D. Tiered planters are like bleachers for your botanical buddies, and wall-mounted pockets can turn a boring, sun-baked wall into a living tapestry of edible greens.

4. Sunlight, The Not-So-Secret Ingredient & 5. Soil Matters (A Lot)
Most veggies are sun-worshippers. Track the light in your tiny domain. Does it get at least 6 hours of direct sun? This will dictate what you can successfully grow. Also, don’t skimp on good quality potting mix. It’s the lifeblood of your container garden. Never use backyard dirt; it’s too dense and can harbor pests. Invest in a quality mix designed for containers.

8. Companion Planting & 9. Succession Planting
Some plants help each other out. Basil and tomatoes are classic pals, as basil is said to repel tomato hornworms. Also, don’t plant everything at once! Stagger plantings of quick-growing crops like lettuce or radishes every few weeks. This gives you a continuous harvest instead of a one-time feast.

12. Don’t Be Afraid to Prune & 13. The Astonishing Garden Tower 2
Regularly snipping herbs and harvesting outer leaves of greens encourages bushier, more productive growth. For a true yield powerhouse, the Garden Tower 2 allows you to grow up to 50 plants in just 4 square feet. It features a central vermicomposting tube that turns your kitchen scraps into organic fertilizer, creating a self-sustaining ecosystem perfect for small spaces.
Discover the Garden Tower 2Apartment Vegetable Gardening System: 1 Amazing Fix!
Affiliate Disclaimer: This post contains affiliate links. If you purchase through these links, I may earn a small commission at no additional cost to you. This helps support the creation of more helpful content. Thank you for your support!
Discover the Power of Container Gardening
Real Veggies Without Eviction Papers!
Let’s be honest. The dream of harvesting your own sun-ripened tomatoes while living in a shoebox-sized apartment often feels like a cruel joke. You’ve seen the Pinterest fantasies: lush balcony jungles, overflowing with bounty. Then you look at your own concrete slab, currently hosting a single, very sad-looking succulent (is it… plastic?), and sigh. The challenges are real. Where does the dirt go? What about the inevitable mess? And will your downstairs neighbour, Mr. Henderson (the one with the award-winning petunias and zero tolerance for rogue soil), finally have a legitimate reason to glare?
Fear not, fellow high-rise horticulturalists! If you’ve typed “help me grow food in my tiny prison cell… I mean, apartment” into your search bar one too many times, you’ve stumbled upon a revelation. Forget those flimsy window boxes that produce three basil leaves and a sense of profound disappointment. We’re talking about a genuine Apartment Vegetable Gardening System, and specifically, the Apartment Vegetable Gardening System: 1 Amazing Fix! that will change your concrete jungle into an edible oasis.
The Great Balcony Betrayal: Why Most “Solutions” Stink (Literally)
You’ve tried, haven’t you? The leaning tower of pots that threatens to topple with every gust of wind. The “self-watering” containers that either drown your fledgling plants or leave them drier than a stand-up comedian’s wit at a tax audit. And the mess! Oh, the glorious, unavoidable mess that turns your pristine balcony into a miniature mud-wrestling arena. You just want a decent Apartment Vegetable Gardening System, something that understands your spatial limitations and your desire not to live in a perpetual state of “controlled agricultural chaos.”
Traditional gardening? Bless its muddy heart, it’s just not cut out for the compact life. You need something smarter, something sleeker, something… revolutionary. You need an Apartment Vegetable Gardening System designed by people who actually get that your “yard” is three feet by five feet and mostly used for storing that bicycle you swore you’d ride more.

Introducing the Undisputed Champion of Confined Cultivation: The Garden Tower!
Alright, drumroll please… The “1 Amazing Fix” we’ve been building up to is the Garden Tower. Now, before you picture some clunky, oversized plastic monstrosity, let me assure you, this isn’t your grandma’s compost bin (though it does have an ingenious composting feature, more on that later!). The Garden Tower is the James Bond of the Apartment Vegetable Gardening System world – sophisticated, efficient, and surprisingly compact. You can check it out here: https://bit.ly/cggtp2.
Imagine this: up to 50 plants in just 4 square feet. Yes, you read that right. FIFTY. That’s not just a few herbs to impress your dinner guests; that’s actual, honest-to-goodness vegetables. Tomatoes that taste like sunshine, not sadness. Peppers with a kick. Lush leafy greens that haven’t travelled further than you do on your morning commute. This is the Apartment Vegetable Gardening System you’ve been dreaming of while sadly munching on store-bought lettuce.
Stop Dreaming, Start Growing!
Look, you could continue your quest for the perfect Apartment Vegetable Gardening System, cobbling together bits and pieces, enduring the mess, and harvesting a thimbleful of disappointment. Or, you could embrace the Apartment Vegetable Gardening System: 1 Amazing Fix! The Garden Tower isn’t just a product; it’s a declaration of independence from wilted supermarket produce and the tyranny of tiny spaces.
It’s time to transform that barren balcony or lonely patio into a vibrant, productive, and surprisingly clean food-growing haven. It’s time to show Mr. Henderson what real gardening ingenuity looks like. It’s time for the Garden Tower. Your fresh, home-grown vegetables (and your sanity) will thank you. Get ready to experience the most rewarding Apartment Vegetable Gardening System on the market by visiting https://bit.ly/cggtp2 today! Your concrete jungle is about to get deliciously green.


Bringing the joy of a productive Apartment Vegetable Gardening System to your doorstep.
With Far Less Work Than Your Beautiful Container Roses
Now, what if you could experience that same profound reward – a bountiful, continuous harvest of fresh herbs, crisp vegetables, and juicy fruits – with an ingenious system that simplifies the entire process, especially for small spaces? The Garden Tower 2 makes this a practical, year-round reality. To understand precisely how this innovative system can revolutionize your access to fresh food, and to see the straightforward evidence of its efficiency and unique composting capabilities, I invite you to investigate further.
Discover the Full DetailsContainer Roses: 7 Proven Secrets for Amazing Growth!
Affiliate Disclaimer: This post contains affiliate links. If you purchase through these links, I may earn a small commission at no additional cost to you. This helps support the creation of more helpful content. Thank you for your support!
Discover the Power of Container Gardening
Are your dreams of a balcony bursting with beautiful blooms…
…ending with droopy, sad-looking twigs that mock your gardening aspirations? Fear not, fellow plant parent! You’re not alone in the quest for rose glory in a pot. Many have tried, and many have, well, composted their efforts.
But what if I told you there are actual, bona fide secrets to transforming your patio into a fragrant paradise, starring none other than thriving container roses? Forget ancient scrolls and mystical incantations; we’ve got 7 proven, down-to-earth (or rather, down-to-pot) secrets that will have your plants pumping out blooms like they’re getting paid for it. Get ready to unleash your inner rose whisperer!
In This Article
- Your Rose’s Royal Residence (It’s All About the Real Estate!)
- The Luscious Loam (Only the Best Dirt for Your Divas!)
- Sip, Sip, Hooray! (Quenching Thirst Without Drowning)
- Sun Worshippers (Give ‘Em a Tanning Bed, Not an Oven!)
- Feed Me, Seymour! (But, Like, Sensibly)
- The Glam Squad Makeover (Pruning for Perfection!)
- The Hibernation Hideaway (Tucking Your Roses in for Winter)
Secret #1: Your Rose’s Royal Residence (It’s All About the Real Estate!)
First things first, your container roses are a bit like tiny, thorny royalty – they have standards, darling. You can’t just shove them into any old plastic bucket you found behind the shed (unless it’s a fancy plastic bucket, maybe).
Pot Size Matters (No Tiny Apartments Here!)
Think penthouse suite, not a studio. Roses have surprisingly deep roots that like to stretch out. Aim for a pot that’s at least 15-20 inches wide and deep. Bigger is often better, giving your container roses more room to grow and insulating those precious roots from turning into baked potatoes on a hot Tennessee afternoon.
Drainage, Drainage, Did We Say Drainage?
If your pot doesn’t have drainage holes, it’s basically a flowery bathtub of doom. Roses hate soggy feet (it leads to root rot, the ultimate party pooper). Ensure there are plenty of holes for excess water to escape. Your plants will thank you with vibrant health, not a gurgling cry for help.
Material Girl (or Boy)
Terracotta is classic and breathes well but dries out fast. Plastic is lightweight but can get hot. Ceramic is pretty but heavy. Consider lighter-colored pots to keep roots cooler.
Picking Your Player
Not all roses dream of life in a pot. Look for varieties labeled as ‘patio roses,’ ‘miniature roses,’ ‘polyanthas,’ or smaller ‘shrub roses.’ These types are generally more compact and won’t try to take over your entire balcony in a single season. When selecting your container roses, check the tag for their mature size – it’s like a dating profile for plants, telling you if they’re a good long-term match for your pot.

Secret #2: The Luscious Loam (Only the Best Dirt for Your Divas!)
Alright, you’ve got the palace, now for the plush furnishings. Shoveling dirt from your backyard into a pot for your container roses is like serving royalty a microwave meal on a paper plate. Just… no. We’re aiming for a Michelin-star meal here, folks, not something you dug up next to where the dog does his business. Garden soil is too heavy, compacts easily, and might contain uninvited guests. Your delicate container roses deserve a high-quality, sterile potting mix. This isn’t just ‘dirt’; it’s a specially formulated blend designed for the unique demands of container life.
Secret #4: Sun Worshippers (Give ‘Em a Tanning Bed, Not an Oven!)
Your container roses are basically sun-chasing supermodels – they need their spotlight! For the best blooms and healthiest growth, they crave at least 6 to 8 hours of direct sunlight per day. However, their delicate root systems are more sensitive. Dark-colored pots can become miniature ovens, slow-cooking the roots. If your patio turns into a furnace, consider lighter-colored pots, grouping plants together for shade, or providing some afternoon shade with an umbrella.

Secret #5: Feed Me, Seymour! (But, Like, Sensibly)
Roses, especially those living the high-demand life in pots, are hungry little hippos. The nutrients in potting mix get depleted quickly. Begin fertilizing in early spring when new growth appears. Use a balanced rose fertilizer every 2-4 weeks. Don’t overdo it, and stop fertilizing about 6-8 weeks before your first expected frost to let them prepare for winter.
Secret #7: The Hibernation Hideaway (Tucking Your Roses in for Winter)
Your container roses are more vulnerable to the cold than their in-ground counterparts. A frozen pot can mean frozen (and very dead) roots. If possible, move your potted roses to a sheltered location like an unheated garage or shed once they go dormant. If you can’t move them, insulate the pots with bubble wrap or burlap. Check the soil moisture every few weeks and give them a little water only if temperatures are above freezing.

Unleash the Rose Titan Within!
So there you have it – your not-so-secret-anymore guide to cultivating container roses that will be the envy of your Pleasant View neighborhood. Growing stunning container roses isn’t about possessing some mythical ‘Green Thumb.’ It’s about understanding their needs, providing consistent care, and facing challenges with a smile. Go forth, armed with this wisdom, and transform your porch, patio, or balcony into your own personal fragrant haven.
At Last! How to Harvest an Abundance of Fresh Food Right on Your Patio
With Far Less Work Than Your Beautiful Container Roses
You, who pour care and attention into your stunning container roses, already understand the profound satisfaction that successful gardening brings. Now, imagine achieving that same level of reward – a continuous supply of fresh herbs, crisp vegetables, and juicy fruits – with a fraction of the effort. The Tower Garden 2 makes it a practical, year-round reality. It uses up to 90% less water, requires less space, and involves no soil, digging, or weeding. If the thought of fresh, pesticide-free, homegrown food greatly appeals to you, the Tower Garden 2 warrants your serious consideration.
Discover the Tower Garden 2Strawberry Planter: 7 Vital Mistakes to Avoid for Huge Harvests
Affiliate Disclaimer
This post contains affiliate links. If you purchase through these links, I may earn a small commission at no additional cost to you. This helps support the creation of more helpful content. Thank you for your support!
Discover the Power of Container Gardening
Intro: You’ve Decided To Grow Strawberries In A Planter.
So, you’ve decided to grow strawberries in a planter. Congratulations! You’re now officially a berry ambitious gardener. But before you start picturing Instagram-worthy fruit salads, let’s talk about the 7 face-palm mistakes that turn strawberry dreams into jam-packed disasters.
In This Article
- Mistake #1: Crowding Your Berries Like a Nightclub
- Mistake #2: Drowning Your Plants in “Love” (a.k.a. Overwatering)
- Mistake #3: Skipping Mulch (Because Chaos is Fun)
- Mistake #4: Burying Crowns Like Pirate Treasure
- Mistake #5: Nitrogen Overload (aka “Leafy Gym Bros”)
- Mistake #6: Letting Plants Retire at 3 (They’re Not CEOs)
- Mistake #7: Picking the Wrong Variety (It’s Not Tinder)
Mistake #1: Crowding Your Berries Like a Nightclub
Picture this: Your strawberry planter is a VIP lounge, but you’ve accidentally turned it into a mosh pit. “Sardine-style gardening” might work for canned fish, but your berries? They’ll stage a revolt.
Why Overcrowding = Berry Chaos
- Tiny Berries, Big Drama: When plants elbow each other for space, they’re too busy fighting to grow decent fruit.
- Mold Parties: Crowded leaves = zero airflow = fungal raves.
- Root Brawls: Tangled roots will hog all the water and nutrients, leaving your plants hangry.
The Fix: Give ‘Em the Celebrity Treatment
Treat each plant like Beyoncé. Day-neutral varieties get 10” of personal space, everbearing types demand 12”, and Junebearing divas require 18”. A 12–14” hanging basket? That’s a two-plant max. No exceptions.

Mistake #2: Drowning Your Plants in “Love” (a.k.a. Overwatering)
Let’s be real: your strawberry planter isn’t a kiddie pool. Newsflash: strawberries prefer sips, not snorkels.
Why Your “Watering Enthusiasm” is a Berry Bad Idea
- Root Rot’s VIP Lounge: Overwatering turns your planter into a fungal nightclub.
- Leaf Meltdowns: Yellow, droopy leaves are your plants’ version of a passive-aggressive sticky note.
- Fruit Sabotage: Soggy roots = energy crisis. Your berries will shrink and taste like regret.
Mistake #4: Burying Crowns Like Pirate Treasure & #5: Nitrogen Overload
If you’re planting crowns like they’re cursed Aztec gold, prepare for a mutiny. Position the crown like a celebrity on a half-submerged yacht—half in soil, half in stardom. Also, your plants aren’t trying to win Mr. Olympia. Pumping them full of nitrogen turns your planter into a leafy frat house. Use a balanced 10-10-10 NPK mix monthly during the growing season.


Conclusion: Your Strawberry Planter Can Be a Berry Legend (or a Tragic Comedy)
Mastering your Strawberry Planter is like hosting a rock concert where the berries are the headliners. Nail these fixes, and you’ll be drowning in fruit so glorious, you’ll start side-eyeing grocery store strawberries. Ignore them? You’re basically directing a garden soap opera titled “As the Berry Wilts.” Your strawberries are rooting for you. Literally.
7 Essential Container Gardening Drainage Solutions for Thriving Plants
Affiliate Disclaimer
This post contains affiliate links. If you purchase through these links, I may earn a small commission at no additional cost to you. This helps support the creation of more helpful content. Thank you for your support!
Discover the Power of Container Gardening
Intro: Why Your Plants Are Drowning (It’s All About Drainage Solutions)
Let’s face it: container gardening drainage solutions are the unsung heroes of plant parenthood. Without them, your leafy friends might as well be swimming in a swamp (and not the fun Shrek kind). Whether you’re a rookie or a green-thumbed guru, these 7 fixes will save your plants from drowning in drama-or dying of thirst. Let’s dig in!
1. Drainage Holes: The OG Lifesavers in Container Gardening Drainage Solutions
Plants despise soggy roots more than socks in sandals-which is why drainage holes are the rockstars of container gardening drainage solutions. These tiny escape routes keep your green buddies from drowning in their own drinks.
Step 1: Play Plant Dentist
Grab a power drill and carve ¼-inch holes in your pot’s base. For XL containers, channel Swiss cheese energy with 3+ holes.
Step 2: Coffee Filters = Soil’s BFF
Line holes with coffee filters to stop soil from pulling a Houdini. It’s like giving your pot a strainer-water drains, dirt stays, and root rot gets evicted.

2. Double Potting: Sneaky Style Meets Function
Let’s talk about ~aesthetic~ plant parents. Container gardening drainage solutions don’t have to cramp your style. Enter double potting—where function hides under a cape of chic decor.
Grab a basic plastic nursery pot (with holes) and nestle it inside that Instagram-worthy ceramic pot. Now, excess water drains into the outer pot’s “secret lair,” where you can dump it before it morphs into a moldy science experiment.
4. Perlite & Pumice: The Dynamic Duo & 5. Gravel Myth: Busted!
Meet the Avengers of drainage: Perlite (the eco-friendly Styrofoam impersonator) and Pumice (volcanic rock with a hydration fetish). Together, they rescue your plants from swampy soil. Mix 1:1 with potting soil for a drainage boost. But whatever you do, don’t put a layer of gravel at the bottom of your pot. Grandma swore by it, but science just called her bluff. It doesn’t improve drainage; it just raises the water table and creates a swamp for the roots.


Why These Solutions Work (And Save Your Plants From Drama)
Let’s get real: your plants crave oxygen like you crave coffee on Monday mornings. Roots aren’t just thirsty divas—they need air to avoid throwing a yellow-leaf tantrum. Proper drainage solutions keep roots breathing easy and your plants from starring in a botanical soap opera. These fixes aren’t just hacks—they’re plant CPR.
Container Gardening Soil pH Balance: 7 Secrets to Fix pH Fast & Boost Growth
Affiliate Disclaimer
This post contains affiliate links. If you purchase through these links, I may earn a small commission at no additional cost to you. This helps support the creation of more helpful content. Thank you for your support!
Discover the Power of Container Gardening
Intro: Why Your Plants Are Drama Queens (It’s All About pH!)
Let’s face it: your container plants are extra. One day they’re thriving, the next they’re dropping leaves like a toddler mid-tantrum. The culprit? Container gardening soil pH balance—or lack thereof. Think of pH as your plant’s mood ring. Too acidic? They’ll sulk. Too alkaline? Cue the leaf-yellowing melodrama. But fear not! We’ve got 7 pH-balancing secrets to turn your green divas into Oscar-winning performers.
In This Article
- Test Your Soil Like a Plant Detective
- Acid-Lovers vs. Neutral Nerds: Pick Your Side
- pH Hacks: From Coffee Grounds to Breaking Bad Vibes
- Potting Mixes: The Great Soil Tinder Swipe
- Containers: Terracotta vs. Plastic Smackdown
- Water Wisdom: Don’t Let Tap Water Betray You
- Fertilizer Finesse: Feed Them, Don’t Gaslight Them
1. Test Your Soil Like a Plant Detective
(Or, How to Avoid Your Basil’s Chlorine-Induced Meltdown)
Container gardening soil pH balance is the ultimate whodunit. One day, your herbs are thriving, the next they’re wilting. Testing pH is like reverse-engineering your plant’s cryptic texts. If the pH is off, your soil’s nutrients are basically locked in a vault. You can use a simple pH meter or test strips to check. Test every 2-3 months—plants are sneakier than a cat plotting world domination.

2. Acid-Lovers vs. Neutral Nerds: Pick Your Side
(Or, Why Your Blueberry Bush is Secretly a My Chemical Romance Fan)
Plants have strong opinions about pH. Some crave acidity like a vampire craves nightclubs. Others? They’re basic. Literally. Blueberries, Azaleas, and Ferns are “Team Acid” (pH 4.0–5.5). Tomatoes, Peppers, and most herbs are “Team Chill” (pH 6.0–7.0). Don’t mix them in the same container, or you’ll have a botanical rumble on your hands.
4. Potting Mixes & 5. Containers Smackdown
(Or, Why Your Fern is Side-Eyeing Your Metal Pot Choices)
Swiping right on the perfect soil is key. For acid-lovers, use an “ericaceous” compost. For most other plants, a standard potting mix with added compost is perfect. The pot you choose also matters. Terracotta is breathable but can leach minerals that raise pH over time. Plastic is pH neutral but holds moisture (drill extra holes!). Metal pots can rust and alter pH, and they get very hot in the sun, which can roast roots.


Conclusion: pH Balance = Plant BFFs Forever
(Or, How to Stop Your Basil from Ghosting You and Finally Thrive)
Mastering soil pH isn’t rocket science. It’s about testing, tweaking, and not putting your acid-loving blueberries in the same pot as your basic-loving tomatoes. Get the pH right, and your plants will finally commit, rewarding you with blooms, fruit, and actual growth instead of leafy tantrums.
Container Gardening Watering Challenges: 7 Pro Tips to Avoid Costly Mistakes
Affiliate Disclaimer
This post contains affiliate links. If you purchase through these links, I may earn a small commission at no additional cost to you. This helps support the creation of more helpful content. Thank you for your support!
Discover the Power of Container Gardening
Ah, Container Gardening Watering Challenges:
Where plants thrive, creativity blossoms, and watering mishaps turn into legendary tales of ice-covered trees and hamster-powered irrigation systems. If you’ve ever accidentally created a 12-foot-tall cherry tree popsicle (thanks, frozen soil sensors!) or turned your petunias into desert survivors, you’re not alone.
Container gardening watering challenges are the ultimate plot twist in every gardener’s story. But fear not! Here are 7 pro tips to dodge disaster and keep your plants laughing with you, not at you.
1. Ditch the Schedule, Embrace the Finger Test
One of the most notorious container gardening watering challenges is the urge to water on a strict schedule. Plants don’t care if it’s Monday; they care if their soil is dry. The finger test is your new best friend. Stick your finger two inches into the soil—if it feels dry, it’s time to water. If it’s soggy, back away slowly. Your own fingertip is the most reliable tool in your arsenal.

2. Drainage Drama: Holes Are Non-Negotiable
The siren song of the beautiful, hole-less pot is a classic trap. Without drainage, a pot is basically a plant coffin. Roots, unlike your favorite bath bomb, do not want to soak endlessly. To fix this, drill holes, add a layer of gravel at the bottom for temporary relief, or use a plain nursery pot (with holes!) inside your decorative container.
4. Timing is Everything & 5. Mulch Magic
Watering at high noon is as effective as trying to hydrate a cactus with a hairdryer; it evaporates too quickly. Watering in the evening can invite mold and slugs. The golden hour is before 10 a.m. To help retain that moisture, use mulch. A layer of straw, coco chips, or wood chips locks in moisture, keeps soil cool, and even doubles as a fashion statement for your containers.


Final Thoughts On Watering Challenges
Container gardening watering challenges are the rite of passage for every plant parent. Every overwatered disaster and crispy leaf is just future comedy gold. With a little patience, a lot of humor, and these pro tips, you’ll soon be the wizard who’s mastered the magical arts of moisture, drainage, and timing. Water wisely, mulch generously, and never underestimate the power of a good finger test.
Grow 50 Plants in 4 Square Feet – No Bending Required
Grow 50 Plants in Just 4 Square Feet
No Bending Required

Transform your gardening experience with the Garden Tower — the innovative vertical garden system for busy, space-constrained, or mobility-challenged gardeners.
Why Garden Tower?
- Maximize Your Space: Grow up to 50 vegetables, herbs, or flowers in just 4 square feet. Ideal for patios, balconies, or small yards.
- Ergonomic Design: Elevated planting zones mean you can care for your plants without bending or kneeling—great for seniors or anyone seeking easier gardening.
- Efficient & Sustainable: Built-in composting system turns kitchen scraps into organic fertilizer, reducing waste and feeding your plants.
- Versatile & Easy to Use: Grow a wide variety of vegetables, herbs, or flowers—no green thumb required.
- Durable & Safe: Made in the USA from food-grade, UV-stable HDPE plastic, designed to last 7–12 years even in harsh climates.
What Makes the Garden Tower Unique?
- Space-Saving Vertical Growth: Grow more food in less space compared to traditional gardening.
- Integrated Composting: Recycle your kitchen waste into rich compost that feeds your plants.
- Adjustable & Rotatable: 360-degree rotation for optimal sun exposure and easy access.
- Sturdy & Portable: Heavy-duty, anchorable feet and optional caster kit for mobility.
- Proven Results: Many users report faster plant growth, higher yields, and less effort.
— Sandi G., Urban Gardener
— Michael S., Home Gardener
Safe & Environmentally Friendly
- Made from 98% recyclable, food-grade HDPE plastic.
- Red List Free, non-toxic, and safe for your family and the environment.
- Designed with sustainability in mind, aiming for a net positive climate impact.
- Limited stock available! Don’t miss your chance to transform your gardening experience.
- 60-day satisfaction guarantee: Grow your first crops, or get a full refund—no questions asked.
Why Wait?
Join thousands of happy gardeners who are enjoying fresh, organic produce with less effort. Whether you’re in a small apartment or a backyard, the Garden Tower makes urban and limited-space gardening simple, productive, and enjoyable.
Note: This page strictly adheres to truthful claims based on verified product features and customer testimonials. No exaggerated or false promises are made.