Liquid Fertilizer Root Burn in Container Gardening: Causes, Symptoms, & Fixes
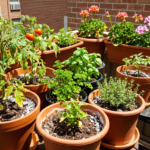
Liquid fertilizer root burn occurs when concentrated synthetic plant food hits dry potting mix. Instead of nourishing your plant, high-salinity minerals pull moisture directly out of tender root tips via reverse osmosis.
Affiliate Disclosure: This post contains affiliate links. If you make a purchase through these links, I may earn a small commission at no extra cost to you. I only recommend products I believe will add value to your gardening journey. Thank you for your support!
Understanding liquid fertilizer root burn is essential for balcony, patio, and apartment gardeners. Because pots hold a limited volume of soil, they dry out quickly, leaving sensitive roots unprotected against fertilizer salt shock.
If your plant droops immediately after feeding, do not panic. You can save your plant today by flushing the pot with clean water, shading the root zone, and giving the root system time to recover.
Fast Fix Checklist for Liquid Fertilizer Root Burn
If your potted plant is wilting right now, take action immediately using this quick checklist:
- Flush the pot: Pour clean water through the container using 2 to 3 times the total volume of the pot.
- Provide shade: Move the container out of direct afternoon sun to reduce environmental heat stress.
- Pause feeding: Stop all plant food applications for 2 to 3 weeks while the root system regenerates.
- Let topsoil dry: Allow the top inch of potting mix to dry out naturally before watering again.
- Scrape salt crust: Remove any white mineral crust from the surface and top-dress with fresh potting mix.
- Clear drainage: Verify that drainage holes at the bottom of the pot are completely unblocked.
- Check root heat: Elevate pots off hot concrete patios using plant risers or pot feet.
What Causes Liquid Fertilizer Root Burn in Container Plants?
Container gardening creates a micro-environment where soil dries rapidly, making plants highly vulnerable to chemical scorch.
The main triggers for liquid fertilizer root burn include:
- Feeding Dry Soil: Applying concentrated liquid fertilizer directly to unmoistened soil causes immediate osmotic shock.
- Overconcentrated Fertilizer: Mixing synthetic liquid plant food stronger than package directions delivers a toxic mineral dose.
- Heat-Stressed Roots: Hot afternoon sun cooks container soil, making root membranes extra sensitive to salt injury.
- Small Pots: Limited soil volume provides almost no safety buffer to absorb fertilizer spikes.
- Cumulative Salt Buildup: Synthetic inputs leave mineral residues behind that accumulate in peat and coir potting mixes over time.
- Poor Drainage: Blocked drainage holes trap hyper-saline water at the bottom of the pot.
- Drought-Flood Cycles: Letting soil become dusty dry before soaking it in feed accelerates root cell collapse.
Visual Symptoms of Liquid Fertilizer Root Burn
Spotting damage early allows you to save the plant before permanent root death occurs.
Watch for these visual indicators of liquid fertilizer root burn:
- Sudden Wilting: Foliage droops abruptly within hours of feeding, even though the potting mix is thoroughly wet.
- Scorched Leaf Edges: Leaf margins turn crispy, brown, and paper-thin within 24 to 72 hours.
- Brown Crispy Root Tips: Healthy white root hairs shrivel, turn dark brown or black, and break easily.
- White Soil Crust: A chalky mineral layer builds up on the soil surface or around the inner pot rim.
- Saturated Soil: The potting mix stays wet for days because damaged roots can no longer drink.
- Mushy Roots: In severe cases, damaged roots decay below ground and turn soft and slimy.
The Science Behind Liquid Fertilizer Root Burn
At the cellular level, root scorch is driven by an osmotic pressure reversal.
Under normal, moist soil conditions, water moves inward across root cell membranes because solute concentrations inside the cell are higher than in the surrounding soil solution.
When synthetic liquid feeds hit dry soil, electrical conductivity ($EC$) surges above $4.0\text{ dS/m}$. This creates severe osmotic stress that forces water out of root cells, causing cellular collapse (plasmolysis).
Horticultural researchers at NC State Extension and UC Davis emphasize that heat accelerates this damage. Urban horticulture expert Dr. Linda Chalker-Scott and soil scientist Dr. Ray Weil note that elevated root temperatures disable protective water channels (aquaporins), leaving plants defenseless against osmotic shock.
Container Risk Factors That Accelerate Scorch
Certain balcony, patio, and windowsill setups increase your plant’s risk of root damage:
- Black Plastic Pots: Dark containers absorb extreme solar radiation, baking the root zone.
- Concrete Patios: Hard outdoor surfaces radiate ground heat directly into pot bases.
- Small Containers: Compact pots lose moisture rapidly in summer winds, concentrating fertilizer salts.
- Afternoon Sunlight: Intense midday rays speed up evaporation right when fertilizer salts are present.
- Dense Soil Without Perlite: Poorly aerated mixes trap salty liquids around roots without adequate airflow.
- Shallow Watering: Wetting only the top inch leaves salts concentrated near shallow feeder roots.
If you are growing heirloom vegetables or flowers from Botanical Interests in vertical planters like the Garden Tower, ensure you maintain proper moisture baselines.
🛠️ Step 0: Start with the Right Potting Mix Base
Preventing root scorch begins with a well-draining, moisture-retentive soil structure. Using a premium substrate like Rosy Soil—which uses biochar and organic matter to balance moisture—helps buffer roots against osmotic shocks.
Customize your potting mix ratio to your plant’s needs:
🪴 Interactive Potting Mix Finder
Select your plant type below to get the exact custom soil blend, drainage ratio, and aeration setup needed for healthy root development:
Potting Mix Finder
How to Fix Liquid Fertilizer Root Burn (Emergency Step-by-Step)
Today: Immediate Salt Flushing
Flush the container thoroughly by pouring clean water through the soil until it drains freely out the bottom holes. Repeat this process 3 to 5 times. Move the pot to indirect shade, pause all plant food, and scrape away surface mineral crusts.
This Week: Aeration & Temperature Control
Water deeply only when the top inch of soil feels dry. Improve root aeration using tips from our potting mix guides. Protect container bases from baking patio heat by following our root heat guide.
This Month: Recovery & Safe Feeding
When new green leaves appear, resume light feeding using gentle organic nutrients from Perfect Plants. Check our container size guides if your plant needs repotting into a larger container.
Real-World Comparisons: Healthy vs. Scorched Containers
| Feature | Healthy Container Plant | Plant With Fertilizer Root Burn |
| Roots | Bright white, plump, firm | Dark brown, brittle, shriveled, or mushy |
| Foliage | Supple, vibrant green throughout | Crispy brown leaf margins, rapid yellowing |
| Soil Surface | Dark, spongy, clean potting mix | White mineral crust, slow-draining surface |
| Plant Response | Sturdy stems, active growth | Immediate droop right after watering |
Debunking Myths About Liquid Fertilizer Root Burn
-
Myth 1: Fertilizer burn is a plant disease.
Root burn is an abiotic physical injury caused by high salt index pressure, not a fungus or virus.
-
Myth 2: Organic fertilizers never burn roots.
While organic choices are much safer, heavily overapplying organic liquids to dry soil can still cause mild osmotic stress.
-
Myth 3: More fertilizer fixes yellow leaves.
Adding more nutrients to a burned root system will worsen root damage and kill the plant.
-
Myth 4: Flushing removes all nutrients forever.
Flushing simply removes dangerous salt spikes so roots can recover and absorb nutrients safely later.
-
Myth 5: Top-dressing soil fixes root heat.
Adding soil on top does not protect pot sidewalls from heat. Check our container problems guide to solve heat stress.
Helpful Container Gardening Resources
Explore our expert guides on the Container Gardening Blog:
-
Watering Guides for establishing consistent patio hydration.
-
Potting Mix Guides for blending airy soil mixes.
-
Container Size Guides for choosing proper pot dimensions.
-
Root Heat Guide for protecting balcony containers.
-
Nutrient Leaching Guide for mastering salt flushing.
-
Blossom End Rot Guide for container tomatoes and peppers.
-
Container Problems Guide for everyday troubleshooting.
Frequently Asked Questions About Liquid Fertilizer Root Burn
What causes liquid fertilizer root burn?
It is caused by applying concentrated synthetic plant food to bone-dry potting soil, creating an intense salt spike that dehydrates root cells.
How do you fix liquid fertilizer root burn fast?
Flush the pot immediately with clean water using 2 to 3 times the container volume, move the plant to shade, and stop fertilizing for 2 to 3 weeks.
Does liquid fertilizer burn roots easily in pots?
Yes. Container plants are prone to root scorch because pots hold limited soil volume and lose moisture rapidly in summer heat.
How long does recovery from root burn take?
Plants usually begin recovering within 1 to 2 weeks after flushing, with new healthy leaves appearing in 3 to 4 weeks.
Does root burn look like overwatering?
Both cause wilting and yellowing, but fertilizer burn occurs suddenly right after feeding and produces crispy brown leaf edges.
Can root burn kill a container plant?
Yes. Severe salt shock can destroy feeder roots and kill a potted plant within days if the excess salts are not flushed out immediately.
Leave a Reply