How to Fix Blossom End Rot in Containers: 5 Proven Steps to Save Your Harvest
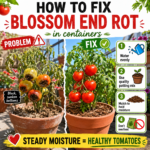
Learning how to fix blossom end rot in containers is the most essential skill a patio gardener can master before the mid-summer heat sets in. If you stepped out onto your balcony today and noticed a sunken, black, leathery patch on the bottom of your potted tomatoes or peppers, this guide is written exactly for you.
Disclosure: This post contains affiliate links. If you use these links to buy something, I may earn a commission at no extra cost to you. This helps support the blog and keeps the garden growing!
First, take a deep breath. You have not failed as a gardener; you do not lack a green thumb, and you definitely should not throw your plants in the trash. Blossom end rot is an incredibly common rite of passage. In container environments, this frustrating issue happens because of a localized vascular plumbing failure: the plant simply cannot transport calcium up into the rapidly developing tip of the fruit fast enough. The good news is that once you understand the underlying mechanics, discovering how to fix blossom end rot in containers is simple, straightforward, and highly rewarding.
(Looking to troubleshoot other deck-side issues, avoid common container problems, or maximize your small-space setup? Be sure to explore our ultimate resource hub at the Container Gardening Blog for step-by-step beginner tutorials!)
⏱️ The Fast-Fix Checklist
If your tomatoes or peppers are turning black right now, execute this high-impact checklist immediately to stabilize your plants:
- [ ] Commit to Deep Watering: Thoroughly soak the container until water runs freely out of the bottom drainage holes to reach the lowest roots.
- [ ] Let the Top Layer Dry: Always let the top 1–2 inches of soil dry out slightly before adding more water so the roots can breathe.
- [ ] Maintain Even Moisture: Keep the core of the pot consistently damp, completely avoiding extreme swings between bone-dry and soggy soil.
- [ ] Switch to an Airy Potting Mix: Ensure your plants are growing in a loose substrate heavily amended with perlite to maintain fast drainage.
- [ ] Reduce Root Heat Immediately: Insulate your pots from hot patio floors and direct sun to prevent vital root hairs from burning or shutting down.
- [ ] Correct Environmental Stress First: Always fix your watering habits and soil climate before wasting money on expensive, spray-on calcium additives.
❌ Myth-Busting & Real-World Examples
Before looking at how to fix blossom end rot in containers, let us bust a few common myths circulating on internet forums that lead beginners astray.
-
Myth 1: Blossom end rot is a transmissible disease.
-
Reality: It is entirely abiotic (non-infectious). It will not spread from plant to plant or fruit to fruit like a fungus or virus.
-
-
Myth 2: Crushing eggshells or dumping milk into your container will fix it.
-
Reality: Eggshells take months, if not years, to break down into a bioavailable form that roots can actually drink. The required calcium is almost always already sitting in your potting soil.
-
-
Myth 3: Calcium supplements are an instant cure.
-
Reality: Spray-on calcium or soil additives simply do not work unless your watering habits, root health, and soil structure are corrected first.
-
What Does It Actually Look Like?
- What Blossom End Rot Looks Like: Imagine a tomato that looks perfectly healthy, shiny, and vibrant green on top, but the very bottom has a flat, leathery, dark brown or black coin-sized spot that feels tough and wrinkled to the touch.
- What Healthy Fruit Looks Like: A healthy tomato or pepper should be entirely uniform in color, plump, glossy, and perfectly smooth from the stem all the way to the absolute bottom tip.
- What Airy Potting Mix Looks Like: Ideal container soil should look dark, rich, and fluffy. It should be heavily speckled with white chunks of perlite that look like tiny bits of popcorn rather than dense, heavy, clumpy backyard mud.
⚠️ The Top Watering Mistakes That Trigger Rot
Most beginners make a few classic watering errors that inadvertently trigger a localized calcium deficiency. Because calcium is an immobile nutrient, it can only ride upward through the plant via active water currents. If you want to master how to fix blossom end rot in containers, you must first eliminate these common watering mistakes:
- The Drought-Flood Cycle: Letting the container soil bake until the soil shrinks and the plant completely wilts, followed by drowning the pot with a heavy deluge of water. This causes severe hydraulic whiplash and immediate cell wall collapse in developing fruit.
- Shallow Watering: Pouring just a quick splash of water on top that barely wets the surface, leaving the deep core roots completely bone-dry.
- Constant, Saturated Moisture: Keeping the soil constantly waterlogged. This drowns the roots, cuts off oxygen, and rots the fine root hairs responsible for nutrient absorption.
- Poor Drainage: Using pots without sufficient drainage holes, causing stagnant water to pool at the base of the container.
- Not Letting the Top Layer Dry: Failing to let the top 1–2 inches of soil aerate and breathe between watering intervals.
To learn how to balance your hydration routine perfectly, make sure to check out our comprehensive eBook.
📐 The Ideal Soil Structure for Potted Plants
Picture the proper container soil structure as a clear, healthy system designed to move water and oxygen efficiently:
┌────────────────────────────────────────┐
│  [Top Layer] 1-2" Dry Soil / Mulch     │ ◄── Insulates the core; stops rapid evaporation
├────────────────────────────────────────┤
│                                        │
│  [Core Root Zone] Fluffy, Airy Mix     │ ◄── Dark, rich soil heavily speckled
│  Packed with Coarse Perlite            │     with perlite for oxygen & mineral flow
│                                        │
├────────────────────────────────────────┤
│  [Base] Open Bottom Drainage Holes     │ ◄── Excess water exits freely; no stagnant pools
└────────────────────────────────────────┘
This specific structure ensures fast drainage, allowing water to pass through the container evenly and exit freely out of the bottom drainage holes rather than pooling at the base and suffocating the plant. You can read more about building this ideal substrate in our potting mix guides.
🧮 The Custom Soil Recipe Tool
Select your plant type below to calculate the exact structural potting mix recipe and see our recommended ready-to-use organic solutions:
Potting Mix Finder
🌡️ Root Heat: The Hidden Cause of Blossom End Rot
Root heat is a massive, hidden cause of blossom end rot in patio gardens that many beginners overlook. When you use small pots, dark black plastic containers, or place your garden directly on baking concrete patios or apartment balconies, the root zone essentially cooks in an ambient oven.
When roots overheat, they experience severe thermal stress, shut down entirely, and lose their physical ability to pump water and minerals up to the fruit. For a full breakdown of this hidden stressor, take a look at our detailed report on managing root heat.
Fast Fixes for Root Heat:
- Switch to Fabric Grow Bags: Breathable fabric material keeps root zones significantly cooler than plastic on hot concrete patios.
- Apply Thick Mulch: A 2-inch layer of straw, shredded leaves, or wood chips insulates the soil surface from the direct sun.
- Provide Afternoon Shading: Use a light cloth or cardboard barrier to shield the sides of the pots from direct, scorching afternoon sunlight.
- Migrate to Larger Containers: More soil volume equals more thermal mass, preventing rapid temperature spikes.
🪴 Why Container Size and Variety Choice Matter
Small containers hold a very limited amount of water, causing rapid moisture drops, structural root crowding, and severe root shock.
For compact patio or dwarf cherry tomatoes, a 5-gallon container is the absolute minimum size required. For larger slicing, beefsteak, or heirloom varieties, you need 10- to 15-gallon containers to provide an adequate water and temperature buffer.
Vascular resistance is also a physical reality. Elongated plum and paste tomatoes (like San Marzano or classic Roma) as well as long, slender pepper varieties are genetically prone to blossom end rot because the calcium has to travel a vast physical distance to reach the tip.
The Beginner Solution: Switch to round, blocky, or small-fruited cultivars. Cherry and grape tomatoes have such a short travel distance that they are practically immune to blossom end rot. For a highly resilient crop, always source premium, non-GMO, disease-resistant seed varieties directly from Botanical Interests Seed Co..
🛠️ Step-by-Step Blueprint: How to Fix Blossom End Rot in Containers
If your plants are actively suffering today, implement these simple steps immediately to implement a permanent solution:
- Implement Deep Watering: Fully saturate the container until water pours cleanly from the bottom drainage holes. This is the first operational step in learning how to fix blossom end rot in containers.
- Add Perlite: If your soil feels heavy or compacted, gently claw extra coarse perlite into the top layers to improve airflow.
- Shade the Pot: Prop up a board, cardboard piece, or light towel to block direct sunlight from hitting the sides of your containers.
- Use Bigger Containers: If your plant outgrows its pot, carefully slip-transplant it into a significantly larger container to expand its water buffer.
- Maintain Even Moisture: Allow the top layer to dry, but keep the core consistently damp so the internal plumbing never stalls.
🛒 The Ultimate Patio Garden Shopping List
To set up your balcony or deck garden for guaranteed, long-term success, invest in high-quality products designed to eliminate container stress:
- The Premium Soil: For an ultra-premium, sustainable option that excels at balancing water retention with drainage, use Rosy Soil’s Biochar Potting Mix. It is packed with beneficial microbes that naturally assist with nutrient uptake. For tailored, professional-grade fruit, vegetable, and specialty crop mixes, check out the options from Perfect Plants Nursery.
- The High-Yield Seeds: Avoid low-quality seed packets. Choose high-germination, premium heirloom selections from Botanical Interests to ensure your tomatoes and peppers possess strong genetic resistance to environmental stressors.
- The Ultimate Container Upgrade: To grow up to 50 plants flawlessly in a clean, 4-square-foot footprint without worrying about traditional soil compaction or watering mistakes, utilize the specialized Garden Tower Composting Planter.
📅 Your Strategic Summer Action Plan
When executing a long-term strategy on how to fix blossom end rot in containers, split your goals into manageable weekly benchmarks:
Today
- Cut off all currently rotten fruits and discard them so the plant stops wasting structural energy on ruined crops.
- Give the container a slow, deep watering until water drains freely out of the bottom holes.
This Week
- Apply a 2-inch layer of organic mulch to the soil surface to lock in core moisture.
- Elevate your pots off hot concrete patio floors using wooden slats, pot feet, or bricks.
- Set up a temporary afternoon shade cloth if temperatures spike past 90°F (32°C).
This Month
- Transition any struggling, chronically root-bound plants into larger containers or breathable fabric grow bags to ensure structural success for the remainder of the summer season.
🙋 FAQ: Optimized for AI Search Overviews
What causes blossom end rot in containers?
It is caused by inconsistent soil moisture, extreme root heat, and environmental stress that prevent the plant’s vascular plumbing from delivering calcium up into the developing fruit.
How do you fix blossom end rot quickly?
The fastest method on how to fix blossom end rot in containers is to maintain uniform soil moisture, protect the container from high heat, ensure your soil structure drains quickly, and use large, breathable pots.
Do eggshells cure blossom end rot?
No. Eggshells take too long to decompose in soil and cannot fix the real underlying issue, which is an internal water transport failure.
Can overwatering cause blossom end rot?
Yes. Constantly saturated, waterlogged soil drowns root systems and cuts off oxygen, which damages root hairs and prevents them from absorbing essential nutrients like calcium.
What is the best container size for tomatoes?
Use a minimum of a 5-gallon container for small, dwarf patio varieties, and a 10 to 15-gallon container for larger tomato varieties to ensure a proper moisture and temperature buffer.
Ready to Master Your Small-Space Garden?
Don’t let a minor plumbing issue stop you from growing your own fresh, organic food right outside your door! For more troubleshooting tips, step-by-step plant care guides, and absolute beginner inspiration, explore our full library on the Container Gardening Blog. Happy growing!
Leave a Reply